We are STOKED to launch our Merch line!! Its up and ready for you to order just in time for the holidays!! Happy Braapin’! Check out our MERCH SITE HERE!

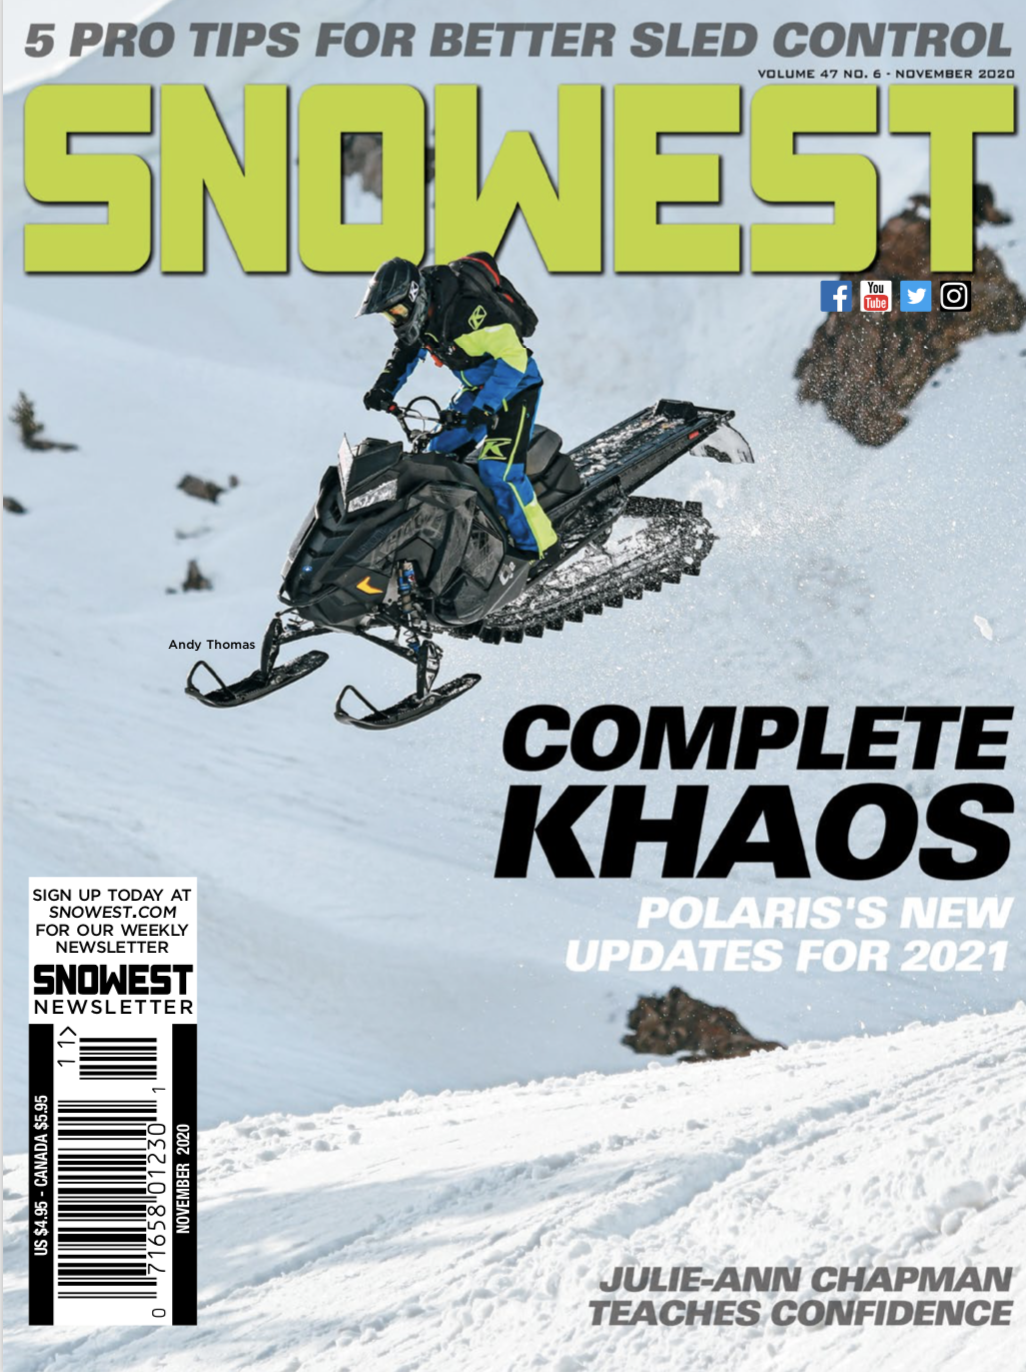
5 Page Article In The latest SnoWest Magazine - Teaching Women Confidence On Their Snowmobiles!
She Shreds was asked by SnoWest Magazine to create an article for their November issue. Julie-Ann was honoured and thrilled to write a piece helping women create confidence on their machines.


Polaris Launches The Empowersports Women’s Riding Council and She Shreds' Julie-Ann is honoured to have been asked to be on this team!

The Empowersports Women’s Riding Council exists to uplift the passions that fuel women and put forth deliberate efforts for increased representation, inclusion and participation of women in powersports. The council joins women from all backgrounds and riding terrains as respected representatives of their sports, who will meet regularly with Polaris leaders to discuss breaking down barriers including increasing diverse female representation, vehicle and gear considerations, safety practices, combating biases and demystifying the sport for more women.
Comprised of distinguished women who are riders, adventurers, leaders and entrepreneurs who bring unique perspectives and insights to the powersports space, Empowerspots Women's Riding Council members are champions for advocacy, empowering women, building community, sparking adventure and fostering safety. Julie-Ann is honoured to be part of this team to help expand the sport of snowmobiling to all women out there! To read more about this crew head to their WEBSITE!
POLARIS interview with owner/operator of She Shreds!!
Below is a little interview Polaris did with owner of She Shreds for their weekly email that goes out to all their staff! Honoured is an understatement. Thank you Polaris! Pictures provided by: Billy Stevens (action shots) and Candice Chernenkoff (head shot).

Truckboss Deck Features & Review

After many years of seeing deck companies come and go, Truckboss has been around since the start. They offer an elite deck to their customers that carry absolutely any toy or work equipment. Their add ons are endless to customize your set up for what you ride. Whatever you ride they carry. You get nothing but durability, quality and top of the line functionality when purchasing a Truckboss Deck. The best part is their weatherproof sealed box!! Here are some of my personal favourite accessories and safety features…
THE SLEDLOCXX CLAMP:


This newly designed metal clamp is next level. Superior durability, slick design and rigid. A clamp I fully trust latching an $18K sled to a truck with!
SMART BOXX:


The best part about this is that I don’t have to crawl under the deck anymore to get the stuff at the far back! Pull it completely out to reach all your goodies that you hide under there!
SLICK CALIBER GLIDERS AND LADDER CATCHERS:


An amazing feature that makes loading so much easier. The gliders and ladder catcher grabs the ski’s and lugs on the track making it so easy to load.
SAFETY FEATURES:


The pin that can be inserted half way down the ramp and the clip that slides into place at the top of the ramp acts as a safety barrier so that when loading on concrete or ice the carbides on the ski’s of the sled don’t push up against the ramp collapsing it. A safety feature I would never load without!
WINCH KIT:
Wether your toddler doesn’t want to get put down and you have to load the sled, if your buddy’s sled breaks down, or if you’re just too scared to load, the winch kit has your back! With a max weight pull of 3500lbs this thing can load pretty much anything for you!
HOW TO LOAD ON A TRUCKBOSS DECK:
TRUCKBOSS DECK IN ACTION:
Layering It Right with KLIM
I’m hot! I’m sweaty! I’m cold! My nipples are hard! I’m sweaty again! I’m cold again! Sounds about right, I mean WRONG!, on a typical sled shred day in the mountains if you’re not layering properly! May as well make yourself a happy & comfortable sledder when your body goes through all the temperature changes on a typical day of sledding in the mountains! What’s the secret to staying warm? You want to help regulate your body temperature to a comfortable warm temperature all day, and the only way to do this is with layers.

Layer 1 – The Base Layer
This is probably the most important layer of them all. This is a layer that is worn against your skin as a 1st layer. Its job is to wick all the moisture/sweat off your body to evaporate. The best fabrics for this are synthetics (polyester) or merino wool. Do not wear cotton, it will stay wet and once you stop moving you will get very cold. Its best to wear a snug fit size that isn’t constricting. Examples of Klim’s base layers are the Solstice 1.0, 2.0 and 3.0.
Layer 2 – The Mid Layer
This layer traps your body heat from escaping to keep you warm, moves the moisture from the base layer out and adds insulation. Materials like fleece, wool and down are perfect for this layer. Mid layers should be roomy enough to fit the base layer and allow you to move without constraint but still somewhat snug to not let your body heat escape. If you’re a person that runs cold, don’t be afraid to wear multiple mid layers such as a fleece and a down jacket under your non insulated shell (3rd layer). It’s always easy to shed a layer and put it back on when needed. Examples of Klim’s mid layers are the Sundance Jacket, Waverly Jacket and Evolution Hoodie.
Layer 3 – The Outer Layer aka the Jacket!
The shell protects you from the snow, wind, sleet and rain! The most important about this layer is that its breathable and waterproof and must allow the moisture from your inner layers to escape. Gore-tex material does a real good job at this but take into consideration, as breathable as Gore-Tex is, when you REALLY get all shweaty and overheated, it cant quite keep up. This is why vents are a very important feature in and backcountry piece; they are designed to exhaust heat as much as they are to let cold air flow in. Exhausting heat when resting is key to effective layering. The jacket can be a little looser fit if you like that look, but make sure it’s not too loose where all your body heat escapes.
Klim has created the best of the best on the market year after year for functionality, durability and fashion. Proper layering does have a level of “personal responsibility” though. We’re all different (and you can see this in the Klim Backcountry Team Chart I created below). It’s the riders’ responsibility to figure out what layering system works best for them in different weather conditions. All Klim can do is offer the tools to help you figure this out and manage it every day you ride. If you’re cold, wet, hot, it’s never the gears fault, it’s your own fault for not dressing appropriately for your body and weather conditions.
Here are a couple top combo picks the Klim team uses in different temperatures:
Julie-Ann Chapman
Please take note the reason I don’t suggest an insulated jacket in the mountains is because they are very often too hot of a jacket. You end up sweating more without the option to shed a layer and then you get cold because you are wet. If you are a person that runs very cold all the time and don’t sweat, an insulated jacket may work for you though!
Temperature 0C to -8C (32F to 17F)
Base Layer:
Klim Solstice 1.0 (if I’m feeling warm) Solstice 2.0 (if I’m feeling cold or if there is a lot of wind) pant & shirt
Mid Layer:
Klim Sundance or Waverly Jacket
Jacket:
Klim Ripsa Onsie
Temperature -8C to -15C to -8C (17F to 5F)
Base Layer:
Klim Solstice 2.0 (if I’m feeling warm) Solstice 3.0 (if I’m feeling cold or its windy) pant & shirt
Mid Layer:
Klim Sundance or Waverly Jacket
I’ll wear the Waverly jacket under my shell at times I’m stopped (like at lunch) and maybe sometimes at the end of the day going back to the truck. If I’m not wearing it it’s in my pack easy access to put on if needed.
Jacket:
Klim Ripsa Onsie

Model Julie Kelly in the Solstice base layers and Waverly Vest
Temperature -15C to -20 + C (5F to -4F)
Base Layer:
Klim Solstice 3.0 pant & shirt
Mid Layer:
Klim Sundance or Waverly Jacket
I’ll wear the Waverly jacket under my shell most of the day if it’s this cold.
Jacket:
Klim Ripsa Onsie. I may even consider a lightly insulated jacket like the Allure Jacket and pant if it’s this cold.
INTERESTED IN WHAT SOME OF THE KLIM BACKCOUNTRY TEAM BOYS WEAR AS LAYERS (back in 2018)?


What's The Difference?
It’s funny how some words are pronounced the same but written and mean something completely differently. Homonyms right? Brake/Break, Cell/Sell, Cent/Scent, you get the idea. Ok so what about Ladies Backcountry Clinics? Ladies Backcountry Rides? Ladies Backcountry Workshops? I know they aren’t pronounced the same, or written the same, but why do people think they mean the same thing or “have to pay for a clinic when a ride/workshop is free”? I get asked this all the time…
I’ve seen females in the sport develop over the years (30 to be exact, go for it, call me grandma, I can take it), and its been a love hate thing for me. Take it back to the old school, where you wore boxy, non waterproof/breathable OEM factory name brands that matched your snowmobile and it would take you 3 days to “break trail” into a spot where today would only take 3 minutes. Back to when there wasn’t many women sledding on the mountain and whoever saw Dan Treadway ride by with his long blonde locks sticking out of his helmet would be in ouuuuuuu and ahhhhhhhhh thinking it was a girl. Back then, women in the sport were all under one umbrella and you barely saw them in the backcountry.

Then there was the evolution of clinics. Around 2010, the OG’s Steph Schwartz, Julie-Ann Chapman up here in Canada, then down in the States was Emile Morishead and Amber Holt. These girls were the pioneers. We had it tough learning to mountain ride “with the boys” and were just left to keep up. Ok yeah the snowmobiles were real hard man handle back then, but still, a lot of tears were shed and a lot of money was spent on wrecked sleds. I can’t speak for the other girls, but I can say for myself, I just wanted to create something for women to be able to learn the sport a little easier than the way I had it…This is why I created She Shreds Mountain Adventures Clinics and Avalanche Courses.

The first official all girls snowmobile clinic in the world with She Shreds Mountain Adventures in Brandywine bowl! Look at how old those sleds are!!!
I spent years getting certified for avalanche safety (and still an ongoing curriculum as I am working towards my operations level 2…), so many hours over the years doing wilderness first aid training, an insane amount of time developing a safety plan for clinic operation (she shreds mountain adventures), so much time developing a business plan, finding the right insurance company to insure operations, developing a clinic guide curriculum, dealing with proper permitting to be able to operate legally, dealing with sponsors so that clients can get prizes at the end of clinics and the list goes on… It’s a job. Clinicians are the highest trained personnel for the best snowmobile instruction out there. You want to learn in a fast manner how to progress your skills on a sled, you want organization, you want reputation, you want to be insured, you want to be safe, you want to learn the most you can in a short period of time, you want to learn ALL the tricks and tips, you want to have fun, you want free quality stuff to go home with, you want experience and knowledge, you hire someone to teach you a CLINIC.

she shreds clinics bring you to some pretty spectacular views!
Then there was the “Ladies Ride” or “Social Ride” movement pioneered by Brandy Floyd. Usually no permits, no insurance, not the best organization, no safety plans, you don’t usually go home with a whole lot learned or new skills, but you do go home with maybe a few new sledding pals (I say usually because there are some organizers that do their diligence and get some stuff like permitting and insurance). Most don’t have their avalanche guide training, most wouldn’t be able to save someone in an emergency. Most of the organizers are on snow part time (once, twice maybe 3 times a week) where the clinicians are on snow usually 6-7 days a week. I would classify these as what they are, social rides. This is why they are free. They are still taking people out in the backcountry and teaching them things without proper certifications or liability coverage. They are responsible for you and your safety. In a court room, who would be liable?

Brandy Floyd’s Ladies Ride
Next is the Ladies backcountry Workshop. Pretty new school. Following the yoga workshops, macramé workshops, dreamcatcher workshop etc we have, with a little bit more liability and risk, the Ladies Backcountry Workshop. Free workshops! Wow! The definition of a workshop is a brief intensive educational program for a relatively small group of people that focuses especially on techniques and skills in a particular field. Pretty close to a clinic correct? BUT, these people putting them on are not professionals, they don’t have the permitting nor the certifications to do snowmobile clinics. No safety plan, spend part time on snow etc etc Would you want to risk your life with someone who can’t try their best at keeping you alive in the backcountry? Ok sure they might get away with calling it a nonprofit organization and not have to provide insurance or permitting, but when the word “donation” or “tips” are being used, is that really nonprofit? Meaning who is liable if something happens? Do they stand a chance in a court room setting? This is why the workshops free.

In all, you get what you pay for depending on the product and safety you want. One thing they all have in common is that the day(s) are put on with a passion for sledding straight from the heart and I give props to all of the women taking on these events. Women in the sport has bloomed and blossomed so much over the past 10 years and this I am loving!!! Stay safe out there and have a blast doing so!

A Beginners Guide to Get Started with Sledding in the Mountains
Here is a couple of basic tips that I could think of to help you gain confidence and start you off on your new snowmobile adventures in the mountains!
Take an avalanche course if riding in the mountains and learn how to use all your avalanche and survival gear. This is the most important intro to the mountains you can have. It will help keep you and others safe in the backcountry.

Take a riding clinic or guided adventure with She Shreds Mountain Adventures or any other company with good credentials.

Get all the necessary survival gear and equipment and carry them with you at all times! If you are wondering what to pack check out this article I wrote: http://www.sheshreds.ca/article/what-to-pack-in-your-backcountry-snowmobile-backpack
Momentum is your friend – The more confidence you have with the throttle the less you will get stuck.
Use your body weight – if you are a girl you will need to for sure use your weight a little more! Swing those hips around; it will help you get that sled over faster.
Watch videos and others ride. Most of us are visual learners. Watch other riders closely (if you’re a girl – watch other girls) and listen to what they are doing with the throttle. Its all about throttle control and body movement.
Email the pros for tips! Feel free to email me with any questions you may have about sleds and sledding, I am MORE than stoked to help you out! info@sheshreds.ca
Ride with experienced people (if you’re a girl – ride with other girls, you can learn lots from each other) and make sure that these people have patience to teach you and help you, don't be afraid of holding the group up. These people you ride with should be happy and encouraging even if you get stuck lots.
Get stuck lots and be patient to get unstuck. Get all that snow out of the track to make it the lightest possible for you to move it around. Here are a couple of Ski Doo & She Shreds tips on how to get unstuck in different terrain:

Commit to anything you do. If you tell your self you can you will most likely do it, if you tell yourself you cant you will most likely fail.
Always wear a teather. This is your “emergency engine shut off” incase your snowmobile pins you down on top of you it will avoid the track from spinning and hurting you.
Don't park uphill always downhill it will save you a stuck!
Look where you want to go! If you look at the tree you will go into the tree!
Keep it flat in the deep snow at first until you get throttle comfy then move to slopes and tricky terrain.
Ride squirrel (in front of an experienced rider and hold onto the mountain bar). Have the experienced rider scream in your ear what they are doing such as “shifting weight in the right leg, hips to the right, counter steer to the left, etc” and pay attention closely and listen to what they are doing with the throttle as they are moving their weight. This will allow you to “get the idea” on how to counter steer and move around in deep snow and off camber terrain.

There are basic steps to start to learn how to snowmobile in the mountains… If you start with step one and move up it will make your life a lot easier! If you start with step 5 right off the bat, you will get frustrated and maybe hate snowmobiling! 1) Throttle control on the flats 2) pow carving/ counter steering on the flats with no trees or obstacles in the way, 3) side hilling on small slopes with no trees or obstacles in the way 4) downhill pow carving with no trees or obstacles in the way 5) wrong foot forward on the flats then on the slopes. Once you have dominated each step, you can then move onto the next. Once you have dominated all steps that start to introduce tricky terrain with tree’s and ditches and such in the way!
Always choose appropriate terrain and set yourself up for success! Wide open terrain with no obstacles(trees), mellow slopes for a while till you're comfy on your sled.
Sled set up is pretty important. (Click here for a little blog I wrote about sled set up) Lets start with handlebars. They shouldn’t be any higher than your belly button and you should sit square above the bars with a slight bend in your elbows. This is the position you are strongest. If you are petite, think about a narrower handlebar set up. Another thing is ski width. Most sleds there are a couple of options for set up. The narrower the skis are the easiest it will be to get the sled over on its side. Next could be shedding a bit of weight off the sled if you are not quite as strong (ie: the pipe can easily shed 10-15 lbs). If you have small hands Skinz sells an adjustable break leaver for example that will bring the break leaver closer to the handlebar. Lots of modifications to help sled set up available out there.
If you have any questions about anything please do not hesitate to email me at info@sheshreds.ca
Happy shredding!!
Tip Video #1 - How to get unstuck in the flats
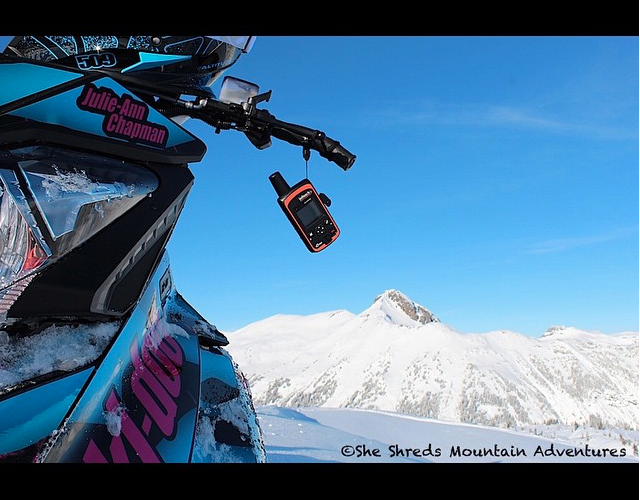
Emergency communication devices
Beyond cell phone range, there are a couple of reliable satellite communicators that you can maintain contact with family and friends and, perish the thought, emergency response teams. I personally carry the Roadpost Iridium 9555 Satellite Phone and the inReach Explorer (which both have special debates offered if ordered before Dec 31 right now!)

The main reason why I carry them is to call for help if ever I need it when I’m out in the mountains snowmobiling. It’s a nice luxury to have as well to text your loved one not to worry if you are going to be late arriving back home because of that one last gnarly stuck you had on the way out!
Why a satellite phone and not just the inReach? Here are my views on the pro’s of a satellite phone… A satellite phone you can actually call the emergency response team and share details such as location, type of injury, patient information etc. This way the emergency response team is well prepared for what they need to deal with when they arrive and it improves efficiency of search and rescue efforts. The Satellite phone is also the most trust worthy, dependable communicator on the market. Unlike the inReach, there is an unmatched opportunity to exchange information, versus a pure SOS signal or a series of 160-character text messages.
Cons of satellite phone:
· They are expensive to buy and expensive to operate but they do have “rental options for a couple of months if your activities are seasonal.
· It can be difficult or impossible to have a conversation if only a weak connection can be made with the satellite
· Because satellites are constantly orbiting, conversations need to be kept short to avoid dropped calls
· A sat phone does not transmit GPS coordinates or offer tracking service. Location and route information can, however, be shared by voice
· It s a big bigger and heavier to carry in a pac

Some pro’s about the inReach device… It isa more affordable option compared to the satellite phone. The inReach is great for minimizing worries of those loved ones back home and being able to constantly check in throughout the day by text messaging (max 160 characters per text). Text messages can be exchanged even over weak signals and it’s a 2 way communicator. Yes it does have an SOS button and gets dispatched straight to the closest search and rescue team of where you are, but they have no idea what to bring to save you or what to expect. So that being said, if they don’t have the right gear to deal with your scenario when they get to you, rescue could get delayed a whole lot longer and if a life is on the line this might make it a “make it or not” kind of deal. Another cool thing about the inReach is that people at home can watch you travel throughout the backcountry on a home computer if they link into your mapshare option. It has a GPS coordinate locator too.
Con’s of the inReach:
· You can only text 160-character texts per message
· Can not communicate with search and rescue team as to what you need
· For ease and quickness of texting, it should be paired to your smart phone to do so. Sometimes smartphones don’t like the cold and die quickly so texting from the actual inReach device take a long time. Its like the old school cell phones where you have to type #2 three times to get to the letter C.
Feel free to check out my MapShare from inReach and watch me travel thoughout the backcountry! If you have any questions please do not hesitate to contact me at info@sheshreds.ca
Sled set up!
I hope everyone is starting to get enough snow to get out on their snowmobiles these days! Let me tell you, the Pemberton backcountry is game on for the season now! Just finished my break in period on the new Ski Doo 850; smiles and giggles non-stop on this sled.

Lets talk about the new Ski Doo 850 and setting it up for your specific needs. First off I would like to say that this sled is probably the best sled I’ve ever owned as is taken out of the crate and ready to ride. No mods necessary. All mods are personal preference from here on in. AND, I’m confident to state that this is the first sled I have ever ridden that won’t need the sway (steering stabilizer) bar taken out! The first thing I usually suggest to most girls for ease of control and getting the sled on its side is to take out the sway bar, not this 850 though, its so easy to get on its side as is!
The first thing I like to suggest for most riders (females especially seeing they are usually smaller than men) is the handlebar height. This is all personal preference, but I can guarantee you will have better ease of control if handlebar height is “correct”. I like to suggest the bars should sit somewhere between the bellybutton and the pelvic bone. Ski Doo summit’s come with an 8” rise which is usually perfect for a 5’10’-6’ person. I am 5’7” and ride with a 6” rise personally. Take into consideration if you are starting to put after market bars and risers on that some bars come already with a 1”-2” rise (unless you get a flat bar). Ski Doo sells an amazing adjustable riser if you are not quite sure what height you like and feel most comfortable with.

Next, I like to suggest dialling in your shocks for your weight. The guy putting your snowmobile together out of the crate in the shop has no idea how much you weigh. If you buy your sled used, the guy or gal before you might have weighed double what you weigh. Think about it, if the shock is set up for a 200lb guy and a 125lb girl tries to get the sled on its side and the shocks are too stiff to compress to get it on the side, you will struggle. If the shocks are set up softer for that lightweight gal, you will have ease to get the sled over on its side. Adjusting them in the field is very easy, I suggest trying a couple different settings to see what feel you like best.
For the front shocks on a ski doo 850 summit all you have to do is twist the metal or plastic (depending if you have an SP or X model) cap on the shock left and right to make it softer or stiffer (pre loading the spring). Get your sled on its side so the ski is off the ground to make your life easier!


For the rear, grab the tool that is in your tool kit (see photo) and place it on the plastic knob and twist on either (softest) 1-2-3-4 or 5 (stiffest). This is your rear torsion spring, if its too soft and you weigh a lot, you may get stuck a lot more (track will trench and you will get stuck). If it’s too stiff and you weigh as much as a peanut, you’ll be bouncing all over the place! Your rear shock can be adjusted the same way as the front shock to pre-load the spring. Play around with both of them, test them all and see what setting you like best!


Those are personally to me the 2 most important adjustments someone should do when getting a new sled. After that, accessories are my personal favorite! A must is a skid plate! Protect that undercarriage from rocks and stumps. The Ski Doo LinQ system it bomb! I carry an extra fuel can and the 3L tunnel bag to bring all my necessary items on adventures. I also got the 12 volt charger installed incase I need to charge my emergency communication devices while I am out an about.

If you have any questions about setting up your sled please do not hesitate to email me at info@sheshreds.ca
Janice Mcwilliam joins the She Shreds coach/guide team!
I am very proud to announce that Janice Mcwilliam will be joining the She Shreds coach/guide team this season! Janice has been a close friend and one of my favourite girls to sled with. She is positive, fun, full of knowledge when it comes to teaching sled progression, very skilled sledder, safe, and best of all she is humble. I cant wait for all you ladies to have fun with her this season. Welcome to the team Janice! I caught up with Janice and this is what she had to say...
Snowmobiling has always been a big part of my life - I can remember my grandpa's 1st snowmobile was a 1972 Bombardier Olympic - it was a tank! I would be riding around on it with my brother when I was 8 yrs old back in Muskoka, Ontario. At that time in Ontario, when you turned 13 yrs old, you could do a 2 day course to get your snowmobile license so that you were legal to make road and railway crossing. So my friends and I did the weekend course together and it was our 1st taste of freedom! Riding to school on snowy weekdays and on the weekends hitting the trails to go to different restaurants for french fries! Snowmobile Rallies, Poker Runs and Puddle Jump competitions! So much fun!

When I moved to BC in 1996 it was obvious that mountain riding was where it was at!
With the intention of buying a sled for access to backcountry skiing - I never did put my skis on my sled - not once! The powder carves and face shots on a snowmobile are unparalleled! Instantly addicting! Although now, as life has a way of changing, I take my 15yr old daughter sled skiing and she loves the access to fresh powder all day long!
I have always ridden Ski-Doo's and have owned many! It is unbelievable how the technology has advanced so far over the years - from a 1972 Olympic to now riding the Gen 4 Skidoo 850 165" the transformation is incredible! With years of riding experience on our local mountains in Pemberton I am so excited that I now have the opportunity to share my knowledge and experience with She Shreds Mountain Adventures!
What do you like most about sledding?
I love the adventure! Whether you are exploring new terrain or you are in an area that you've been a hundred times - no 2 days in the mountains are ever the same!
What is so inspiring riding with a bunch of girls?
"back in the day" I was always the only girl - If I saw another chick on a sled in the mountains I would ride right over and introduce myself. Now there are days when there are no guys with us - girl power!! so much fun energy & team work!
Sledding in 4 words:
cheeks sore from smiling
What do you look forward to most working with She Shreds?
I love to teach people riding (or getting unstuck) techniques that can make life easier. Also seeing the smiles on people's faces is just priceless! Introducing people to a sport that I am so passionate about is a dream come true!
Most memorable sledding day?
so many that it would be impossible to pick just one!!
Feel free to follow Janice on her facebook page - https://www.facebook.com/janice.mcwilliam.7


Ski Doo partners with She Shreds!!
We are bayond honoured, proud, excited, stoked, fortunate... all smooshed into one! So pumped to be partnering with the brand I grew up riding! And very stoked to be brining in a mini-fleet of Ski Doo's for She Shreds clients to ride! To read full press release from ski doo please click the following:
http://www.snowest.com/2016/11/skidoo-partners-with-she-shreds

Full edit is released! Good times with She Shreds ladies!!
The full edit to our She Shreds ladies trip to Golden BC is out!!! Enjoy!!! Big thanks to everyone that made this trip so awesome and memorable! You guys rock!!